Recording a lecture in a smaller lecture hall
In these smaller rooms there is no record button on the touch panel.
Use a voice recorder because the sound recorded in a small room is often poor quality or absent. But if you work on the laptop, please record for synchronization!
Recording
In the smaller rooms there is no room microphone, so for good quality sound you will always need a voice recorder. This means that all recordings must be post-processed by the CPIO to add this sound. As a result, there is no preference for recording system, and both MS Teams and the video platform can be used. A comparison between both methods:
- Resolution: video platform 1280 x 720, Teams (presentation area only): 1724 x 970
- Size of the file: MS Teams recordings are 66% of the size of the recording on the video platform.
It therefore seems more economical to make the recordings in Teams.
On the other hand: recordings made in Teams are deleted after a year, cannot be searched and sometimes have to be edited because students are visible.
Important!
If you want to give blended lectures, i.e. in contact with students at home via Teams, it is better to record in Teams anyway, because the microphone can only be used by one application at a time. Depending on what you start earlier, there is no sound during recording or no sound in teams.
Record in MS Teams
- Start the meeting
- Take over the screen and project your PowerPoint
- Put yourself in the spotlight:
- Right-click on the video image of yourself. Then select “Spotlight” from the menu.
- View the meeting participant list. Right-click on the person you want to highlight (yourself) and select “Spotlight”.

- Start recording by going to the controls and selecting More options (...) > Start recording. This recording takes place in the cloud and is saved in MS Stream.


Recording with the video platform
- Start your PowerPoint first.
- (PC) If that is an option: select "Remote Education" on the touch panel. The microphone is turned on.
- (PC) On the desktop, click on the link to the video platform

- (Laptop) Go to the video platform in Chrome via https://video.uu.nl
- Log in (far right top)

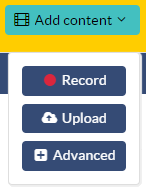
- Click on "Add content"

- Click "Record"
- (PC) Click on "Both" (the camera is turned on, you need it for sound)
Note: On your first recording, Chrome will ask for:
' '- Use your microphone
- Use your camera.
Click "Allow" on both questions to continue.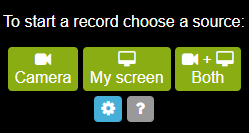
- (laptop) Click on "My screen"
Note: On your first recording, Chrome will ask for:
- Use your microphone.
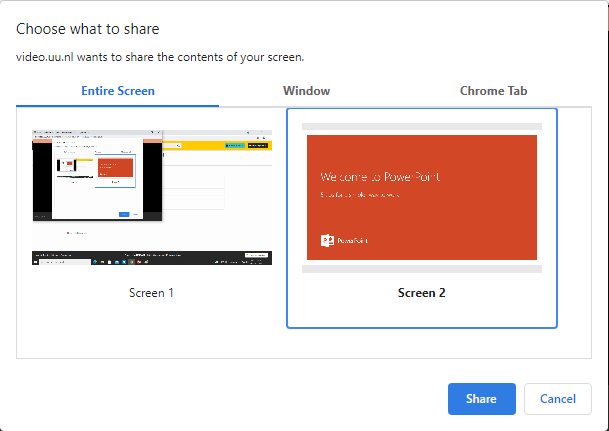
Click: "Allow" to continue. - Now first go to your PowerPoint and project it (important!!).
- Use Alt-Tab (hold Alt, tap Tab) to return to the screen where you started recording.
- Choose the right screen to record and click "Share"
- Click "Record" at the bottom of the page to start recording
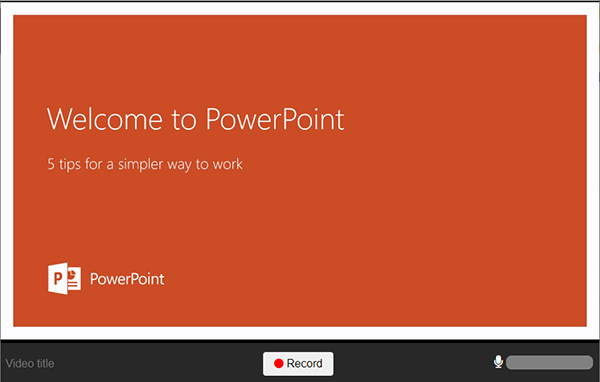
- Use Alt-Tab to return to your presentation and give your lecture
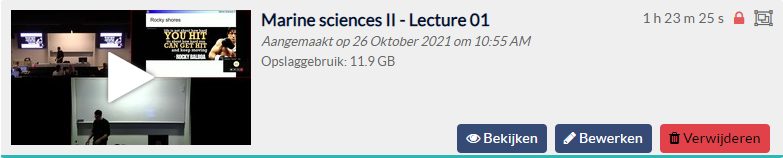
- Don't forget to close the recording at the end of the presentation! If you log out you will lose everything. You can return to the recording screen with Alt-Tab. Click "Stop". Wait for the presentation to upload, but you don't have to wait for it to be processed.


The presentation is now in your own channel. To make the recording available to the CPIO to add the sound from the voice recorder:
- or they are moved to the course folder
- or CPIO rights are given to move and edit it
Move
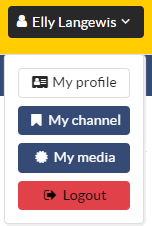
- Go to your own channel (click on your name and choose "My channel")
- Click "Edit" or "Edit" on your recording
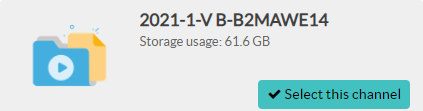
- In the "Parameters" tab under "Location" choose "Select a channel"

- Select "Search" at the top right
- Search for the course code and click on "Select this channel" in the folder of the current academic year
- Don't forget: click "Save changes" at the bottom right of the screen!

- Finished! Don't forget to alert the CPIO that a recording has been made so they can edit and publish it.


Give CPIO rights
(This is not necessary if the recording is in the course folder.)
To give someone at CPIO rights to the recording to download and edit it:
- Follow steps 1-2 under "Move"
- Select the "Permissions" tab

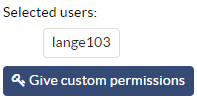
- Scroll down and select "Add permissions to users" under "Users with direct permissions"

- Search for "Lange103" and click on the cross behind the name
- Then click on "Give custom permissions"
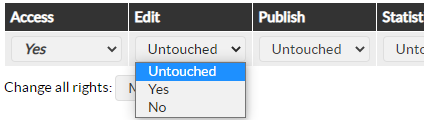
- Now you can set the editing rights to "Yes",
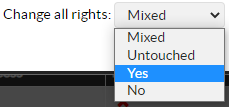
or enter Yes at "Change all rights"
- And don't forget "Save changes"! This has to be done twice!


