Recording lectures and/or knowledge clips: Difference between revisions
| Line 21: | Line 21: | ||
You can also have this done by the CPIO. If you want to leave the recording in your own channel, you can give CPIO editing rights by: | You can also have this done by the CPIO. If you want to leave the recording in your own channel, you can give CPIO editing rights by: | ||
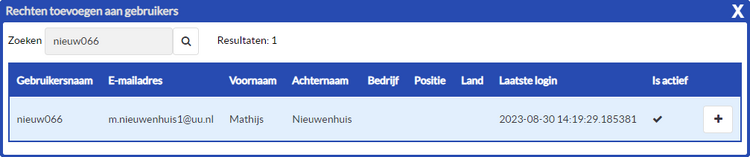
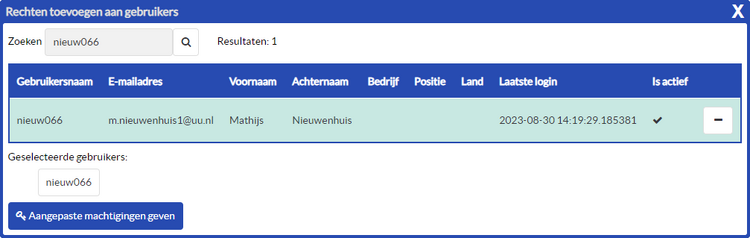
# under Edit -> Permissions/Rights -> Users with direct rights -> Add rights to users -> search by SolisID employee CPIO (''for example Nieuw066 for Mathijs Nieuwenhuis'') | # under Edit -> Permissions/Rights -> Users with direct rights -> Add rights to users -> search by SolisID employee CPIO (''for example Nieuw066 for Mathijs Nieuwenhuis'') | ||
# Click on the + | # Click on the little + behind the name<br>[[File:Rechten1.png|750px]] | ||
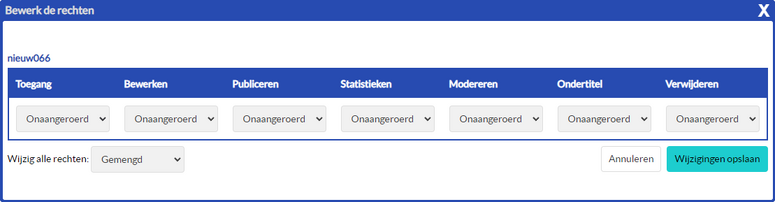
# Click "Give Custom Permissions"<br>[[File:Rechten2.png|750px]] | # Click "Give Custom Permissions"<br>[[File:Rechten2.png|750px]] | ||
# Change the permissions to "Yes" for at least Access, Editing and Publishing and save<br>[[File:Rechten3.png|775px]] | # Change the permissions to "Yes" for at least Access, Editing and Publishing and save<br>[[File:Rechten3.png|775px]] | ||
Revision as of 10:39, 25 October 2023
You can record Knowledge clips in different ways.
Even in halls where large-scale recording is not possible (Ruppert D, all halls in BBG) you must record differently. This can be done via the video platform's website, in combination with a voice recorder.
For an online lecture via Teams, it is easier to record in Teams. This is then immediately available to all students.
It is better to have all recordings together on the video platform. You can download the Teams recording as an MP4 and then upload it to the video platform.
Record via the video platform website
Starting recording
- Go to the video platform in Chrome via https://video.uu.nl
- Log in (far right top)

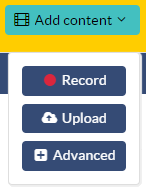
- Click on "Add content"

- Click "Record"
- Click on "My screen"/"Full screen" for audio only or "Both"/"Both" if you also want to record video.
Note: During your first recording, Chrome will ask for :
- Use your microphone
- Use your camera.
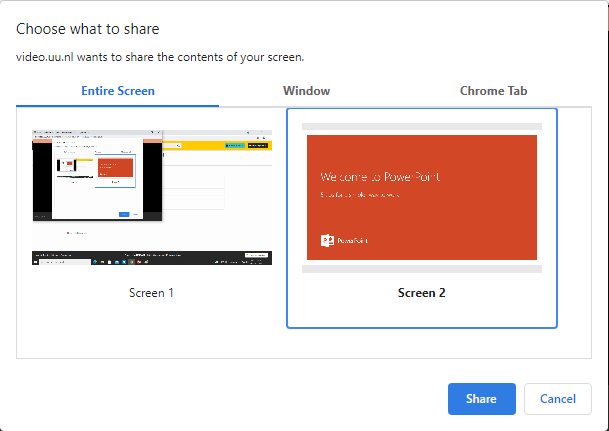
Click: "Allow" to continue. - Choose the screen to record (usually just your laptop screen) and click "Share"
- Click "Record" at the bottom of the page to start recording
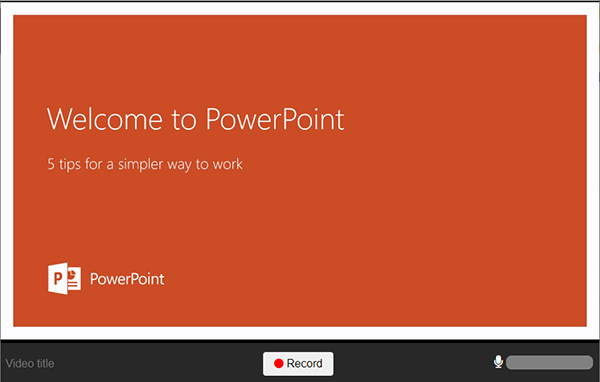
- Make the recording window small (with -), and click on "Hide" in the window below (don't forget, otherwise it will be in the recording!)

- Don't forget to close the recording at the end of the presentation! If you log out or close everything with the cross at the top right, you will lose everything. You can return to the recording screen with Alt-Tab. Click "Stop". Wait for the presentation to upload, but you don't have to wait for it to be processed.


Publish
The presentation is now in your own channel. In this video you can see how you can publish this and give students viewing rights.
You can also have this done by the CPIO. If you want to leave the recording in your own channel, you can give CPIO editing rights by:
- under Edit -> Permissions/Rights -> Users with direct rights -> Add rights to users -> search by SolisID employee CPIO (for example Nieuw066 for Mathijs Nieuwenhuis)
- Click on the little + behind the name
- Click "Give Custom Permissions"
- Change the permissions to "Yes" for at least Access, Editing and Publishing and save


Tips
- First start the presentation before you start recording, so that it starts neatly
Record with MS Teams
For an online lecture via Teams, it is easier to record in Teams. This is then immediately available to all students.
It is better to have all recordings together on the video platform.
You can download the Teams recording as an MP4 and then upload it to the video platform.
It is a bit more difficult at a hybrid college. Watch this nice instructional video about using Teams in a lecture hall: https://video.uu.nl/permalink/v1261b8f32d2buyh32cl/iframe
Download
If this recording was started by someone with a UU employee account, this recording will be saved in Stream and can only be downloaded by the person who started the recording. This person can set it so that it can be downloaded by other members.
If the recording was made by a guest teacher ("Guest") or a student (assistant) (who do not have an employee account), it can be downloaded as an MP4 for all Team Members. Sometimes the teacher logs in automatically via Microsoft (and is then a guest), perhaps because this teacher also has an active MS account at that time. It may help to log out of MS, so that Teams is forced to provide a login screen and the teacher can log in with SolisID. These recordings are not put on Streams and are therefore deleted when the Team is deleted.
Upload to video platform (or elsewhere)
Be careful: a number of participants can often also be seen on the recording, and that is due to privacy not desirable. So these have to be cut out!
- By the CPIO
- The simplest way is to give someone from the CPIO access to your Teams site, with all editing rights.
Once a recording has been made, the CPIO can download, edit and upload this recording with metadata into the video platform. - For a single recording, you can download the recording as an MP4 and send it via WeTransfer to cpio@uu.nl.
- The simplest way is to give someone from the CPIO access to your Teams site, with all editing rights.
- Upload yourself
- Go to http://video.uu.nl
- Go to the correct course folder
- Choose "Add a video"
- Upload the MP4 (turn on the slides detection as well)
- Set all metadata correctly
- You can still edit in the video platform:
- take out bits (note that this operation generates a new video, with a new link)
- Create another image section
- create dynamic rich media (composite), and cut the video into parts (see Dynamic rich media)
Record with PowerPoint
PowerPoint also has the option to record. Remember: exporting the recording takes a lot of time! Preference is therefore given to Teams, or the video platform.
Points of attention:
- Your sound is recorded per slide. It is therefore not possible to go back to slides during the recording.
- If you make a nice bridge to the next slide and continue talking during the transition, there is a short hiccup in the sound.
- Videos in the slides start immediately, but you sometimes cannot hear the sound yourself. However, this is recorded over your own sound. You are then unintelligible.
If you have made a recording with a video of yourself, you can send it as a PPT to CPIO (not the MP4). The CPIO will then:
- Possible post-processing of the sound: volume, parts removed
- Do an export of just the presentation
- Do an export of just the video
- Combine these into one mp4
- Upload this and split it into two 'streams' in the video platform
- Metadata and publishing
Self Publish
- You can make an MP4 of this and place it on the video platform or YouTube yourself
- You can also place the ppt yourself in BB, where students will then receive a button for each slide to play the sound. The latter takes up little space. You can optionally protect the PPT with a password.
- If you make an MP4 where you only have sound, make sure that the speaker on each slide is out of the picture (not if you are going to offer the PowerPoint to the students)
- If you also have a video of yourself, make sure there is room for it on each slide, so that the video does not cover essential information
- When this MP4 is used for upload, the sound appears to be ahead of the image. This is unfortunately not possible without further ado.
The CPIO can therefore place this on the video platform, but we would prefer to receive the PowerPoint itself.
Tips
- Don't talk during a slide change, as this occasionally seems to cause glitches in the sound
- Think about the location of your speaker/video
Record with Camtasia
On a UU computer
You can get a license for Camtasia:
- You apply for Camtasia via Topdesk, stating your Solis ID and WBS number: Camtasia costs €27.47 per user per year. After approval by us, the application enters the user's SoftwareCeneter.
- You can use a WBS number from an educational institute for this, which can be requested from cpio@uu.nl.
On your own computer
- For your own laptop you can download Camtasia from Techsmith download center and choose 8.6 (PC) or 2 (Mac). Please contact CPIO@uu.nl to obtain a license for these versions.
- If this version does not work on your computer: you can also go to SurfSpot.nl, log in to Utrecht University, and order Camtasia 2020 (together with Snagit) for 135 euros. You can declare this amount to the educational institute.
Recording and processing
When you record you produce a trec file. You can send this to CPIO@uu.nl via WeTransfer, after which we will place it on the video platform. You can also include video of yourself. What the CPIO does with it is:
- Possible post-processing of the sound: volume, parts removed
- Upload into the correct folder for the course on the video platform
- Provide the recording with the correct metadata:
- teacher name
- date of recording
- language
Tips for all shots
- Don't make it too long, rather make multiple parts
- Speak loud and clear (let the neighbors join in)
- Consider the background for video (not too busy) and the light (preferably no window behind you)